Grand Prix
This article needs more images.
You can help by uploading one and adding it to the article.
Reason: None.
- This article is about the Grand Prixs in the F-Zero games. For other uses, see Grand Prix (disambiguation).
Grand Prix is the main mode in the F-Zero series games where pilots compete for points. Grand Prixs usually consist of five tracks in which racers compete for points to see who is the better racer.
F-Zero

In F-Zero, there are three Grand Prix cups, each with five circuits to complete. The player then chooses between Beginner, Standard, and Expert difficulty classes by pressing the Select button. The player has two lives to start with, being depleted for ranking too low or for losing their Power. If the player gets 10,000 points, they will earn an extra life, up to a total of five. After each lap, the racer is rewarded a boost if they have an open slot.
In order to move forward, the player needs to reach a certain place during the race's laps: At least 15th place for the first lap, 10th place for the second lap, 7th place for the third lap, 5th place for the fourth lap, and 3rd place for the fifth lap. Placing any lower will cause the player to retire, and placing 20th will cause the player to lose immediately. The player will also get points each lap based on their position: 900 for 1st, 600 for 2nd, 400 for 3rd, and 200 for 4th and below. The final lap is 2500 for 1st, 1500 for 2nd, and 1000 for 3rd.
As the pilot clears more laps, additional machines resembling an orange or flashing Wild Boar will serve as obstacles, moving slowly along the track. The flashing ones will explode upon contact. They are ranked out racers that used to be green or purple, and can be found in 5th place and below.
BS F-Zero Grand Prix

In BS F-Zero Grand Prix, the player has to get through Free Practice on four tracks that were introduced in F-Zero. Once completed, the game shifts over to Grand Prix mode. Points are no longer rewarded because the player never gets a Game Over by retire. The player has six minutes per track. Same rules apply as F-Zero, except the race does not end after the fifth lap. This is the only mode where the player has a chance to play on the new tracks. Once the final track is complete, the game no longer continues to the title screen, likely due to how the Satellaview is schedule-based.
| Week 1 Knight |
Mute City I |
Big Blue |
Death Wind I |
Silence |
Sand Storm I |
|---|---|---|---|---|---|
| Week 2 Queen |
Mute City II |
Port Town I |
Sand Ocean |
White Land I |
Sand Storm II |
| Week 3 King |
Mute City III |
Death Wind II |
Red Canyon I |
Port Town II |
Silence II |
| Week 4 Ace |
Mute City I |
White Land II |
Red Canyon II |
Fire Field |
Big Blue II |
BS F-Zero Grand Prix 2
In BS F-Zero Grand Prix 2, the Grand Prix works the same as in the previous game. However, the Grand Prix is split between races in the main event and separate races the player can practice on.
Soundlink
| Week 1 | Forest I |
Big Blue II |
Sand Storm I |
Forest II |
Silence II |
|---|---|---|---|---|---|
| Week 2 | Mute City IV |
Forest III |
Sand Storm II |
Metal Fort I |
Metal Fort II |
Practice
| Ace | Mute City IV |
Big Blue II |
Sand Storm I |
Silence II |
Sand Storm II |
|---|
F-Zero X

In F-Zero X, the player chooses the class difficulty first, either Novice, Standard, or Expert, before choosing the cup. The player starts with the Jack Cup, Queen Cup, and King Cup. The Joker Cup is unlocked by finishing in first place on the other cups on Standard difficulty[citation needed]. The X Cup is unlocked by finishing in first place on the other cups on Expert difficulty[citation needed], and the cup is built by randomly selected tracks. After choosing the cup, the player can then choose their machine. Unlike in F-Zero, races consist of three laps across six tracks rather than five laps across five tracks.
During the races, the player has four lives to start with, but can earn another life by making five other competitors retire. However, an extra life can only be earned once per Grand Prix. Boost Power is granted on the second lap of a race. A racer's starting position at the start of the next race is the inverse of where they placed in the last race. For example, finishing in 1st place will have the racer start the next race in 30th place, finishing in 2nd place will have the racer start in 29th place, and so forth. At the conclusion of the Grand Prix, the top three pilots race around an oval track, as a victory lap. They will stop after a minute or so of racing and be placed on pedestals of 3rd, 2nd, and 1st place. If cleared on Standard class or higher, the pilots are seen outside their machines. If cleared on Expert class, the player gets to see the pilot's victory speech.
Unique to F-Zero X, if the player were to press L, it toggles a green time display that estimates how far away the leading AI racer is from them, "+" means the pilot is behind while "-" means the pilot is ahead.
Tracks


Points
At the end of a race, the racers are awarded points based on their position. The racer in 2nd place for points will be considered the player's rival. If there is a tie at the conclusion of the Grand Prix, the pilot that placed 1st place the most will be declared 1st. If there is still a dispute at this point, whoever had the highest point total after the second to last race is rewarded 1st.
| Rank | 1 | 2 | 3 | 4 | 5 | 6 | 7 | 8 | 9 | 10 | 11 | 12 | 13 | 14 | 15 | 16 | 17 | 18 | 19 | 20 | 21 | 22 | 23 | 24 | 25 | 26 | 27 | 28 | 29 | 30 |
|---|---|---|---|---|---|---|---|---|---|---|---|---|---|---|---|---|---|---|---|---|---|---|---|---|---|---|---|---|---|---|
| Points | 100 | 93 | 87 | 81 | 76 | 71 | 66 | 62 | 58 | 54 | 50 | 47 | 44 | 41 | 38 | 35 | 33 | 31 | 29 | 27 | 25 | 23 | 22 | 21 | 20 | 19 | 18 | 17 | 16 | 15 |
F-Zero X Expansion Kit
The F-Zero X Expansion Kit introduces twelve new courses, accessed the same way as the standard five cup selection. An Edit Cup can also be played, which is built by the custom tracks the player creates.


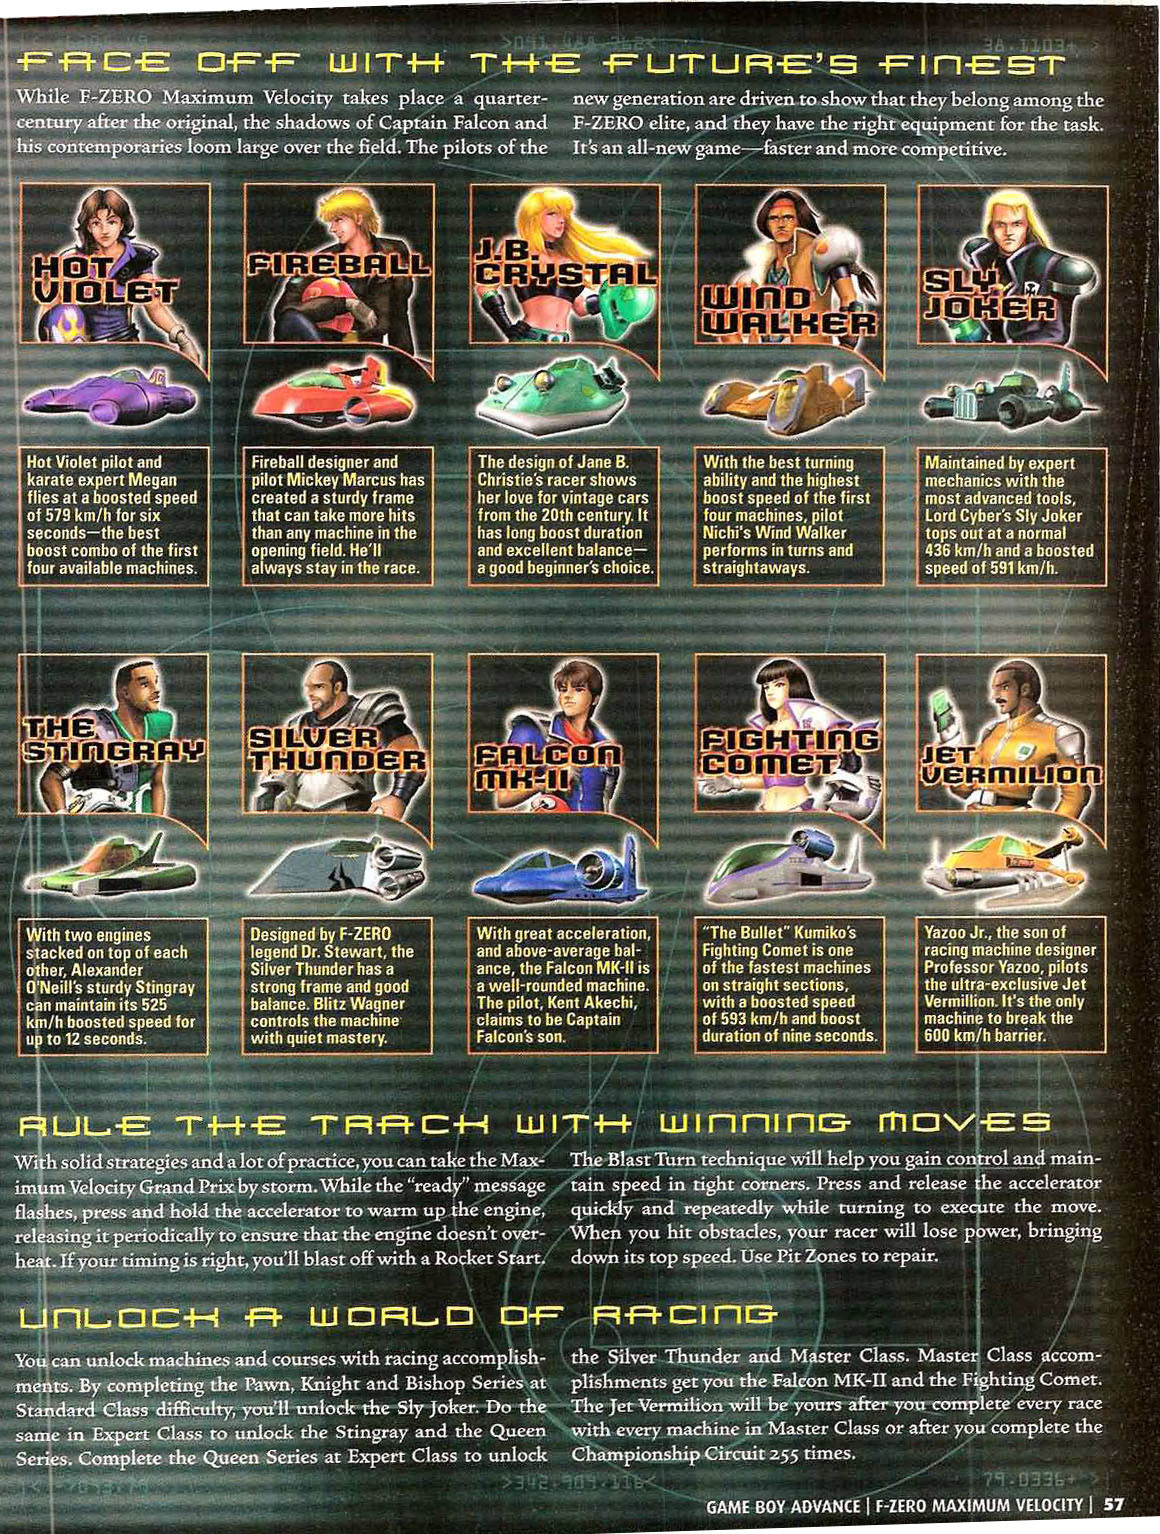
F-Zero: Maximum Velocity

In F-Zero: Maximum Velocity, the player can initially choose between the Pawn, Knight, and Bishop Leagues, with the Queen League being unlockable. Once the League is chosen, they can choose between the Beginner, Standard, and Expert classes, with Master class being unlockable. The player starts with four lives and has to complete five laps across five tracks, as well as needing to reach a certain rank during the laps in order to continue. They need to be at least rank 15 on the first lap, rank 10 on the second lap, rank 7 on the third lap, rank 5 on the fourth lap, and rank 3 on the final lap. Ranking too low will cause the player to retire when they cross the starting line. No points are awarded at the end of a race, final results are based purely on the racer's overall position rank.
Ranked-out racers will appear as obstacles during the races, being either yellow or green machines, though there is no difference between them. When racing in Standard class or higher, floating orbs begin appearing on the tracks, appearing more frequently the more laps are cleared and depending on what class the player is on. Running into one of these orbs will cause it to explode, similar to a mine.
The Queen League is unlocked by winning the Pawn, Knight, and Bishop Leagues on Expert class. Master class is unlocked when Expert class is cleared on the Queen League[1].


F-Zero GX

In F-Zero GX, the rules for Grand Prix are the same as in F-Zero X, including point distribution. However, there are five races in the cups rather than six. At first, the player only has access to the Ruby Cup, the Sapphire Cup, and Emerald Cup with the Novice, Standard, and Expert classes. By placing first in all cups while on Standard class rank, the Diamond Cup will be unlocked.[citation needed] By placing first in all cups on Expert class rank, the Master class rank will be unlocked. By placing first in all cups on Master class rank, the AX Cup will be unlocked, which consists of tracks from the F-Zero AX arcade counterpart. By completing the AX Cup on Novice class, Mute City: Sonic Oval will be unlocked for other modes.
At the conclusion of the Grand Prix, the top three pilots race around Mute City: Sonic Oval, as a victory lap. After that, the top three pilots are placed on pedestals while the other participants cheer them on. The 1st place racer will be interviewed on F-Zero TV.


Points
At the end of a race, the racers are awarded points based on their position. The racer in 2nd place for points will be considered the player's rival. If there is a tie at the conclusion of the Grand Prix, the pilot that placed 1st place the most will be declared 1st. If there is still a dispute at this point, whoever had the highest point total after the second to last race is rewarded 1st.
| Rank | 1 | 2 | 3 | 4 | 5 | 6 | 7 | 8 | 9 | 10 | 11 | 12 | 13 | 14 | 15 | 16 | 17 | 18 | 19 | 20 | 21 | 22 | 23 | 24 | 25 | 26 | 27 | 28 | 29 | 30 |
|---|---|---|---|---|---|---|---|---|---|---|---|---|---|---|---|---|---|---|---|---|---|---|---|---|---|---|---|---|---|---|
| Points | 100 | 93 | 87 | 81 | 76 | 71 | 66 | 62 | 58 | 54 | 50 | 47 | 44 | 41 | 38 | 35 | 33 | 31 | 29 | 27 | 25 | 23 | 22 | 21 | 20 | 19 | 18 | 17 | 16 | 15 |
Rewards
Completing cups will earn the player tickets based on the position they finish the cup in and the class they are playing on. Completing cups by fulfilling certain requirements can also earn machine parts and other items the player can purchase in the F-Zero Shop with the tickets they have collected.[2]
Ruby Cup
- Tickets
| Position | Novice | Standard | Expert | Master |
|---|---|---|---|---|
| 1st | 15 | 20 | 30 | 40 |
| 2nd | 10 | 14 | 22 | 32 |
| 3rd | 9 | 12 | 20 | 30 |
| 4th-10th | 7 | 8 | 14 | 24 |
| 11th-20th | 6 | 7 | 12 | 20 |
| 21st-30th | 5 | 5 | 6 | 6 |
- Custom Parts
- Complete one cup on Novice class: Body - Valiant Jaguar
- Complete one cup on Standard class: Body - Big Tyrant
- Win one cup on Novice class: Body - Rapid Barrel
- Win one cup on Standard class: Body - Liberty Manta
Sapphire Cup
- Tickets
| Position | Novice | Standard | Expert | Master |
|---|---|---|---|---|
| 1st | 15 | 20 | 30 | 40 |
| 2nd | 10 | 14 | 22 | 32 |
| 3rd | 9 | 12 | 20 | 30 |
| 4th-10th | 7 | 8 | 14 | 24 |
| 11th-20th | 6 | 7 | 12 | 20 |
| 21st-30th | 5 | 5 | 6 | 6 |
- Custom Parts
- Complete two cups on Novice class: Cockpit - Muscle Gorilla
- Complete two cups on Standard class: Cockpit - Windy Shark
- Win two cups on Novice class: Cockpit - Super Lynx
- Win two cups on Standard class: Cockpit - Scud Viper
Emerald Cup
- Tickets
| Position | Novice | Standard | Expert | Master |
|---|---|---|---|---|
| 1st | 17 | 24 | 35 | 46 |
| 2nd | 12 | 17 | 26 | 36 |
| 3rd | 10 | 15 | 24 | 33 |
| 4th-10th | 8 | 10 | 18 | 25 |
| 11th-20th | 7 | 8 | 15 | 22 |
| 21st-30th | 6 | 6 | 7 | 7 |
- Custom Parts
- Complete three cups on Novice class: Booster - Saturn SG
- Complete three cups on Standard class: Booster - Raiden 88
- Win three cups on Novice class: Booster - Titan G4
- Win three cups on Standard class: Booster - Triple Z
- Win the Ruby, Sapphire, and Emerald Cups on Expert class: Body - Speedy Dragon, Cockpit - Garnet Phantom, and Boost - Thunderbolt V2
Diamond Cup
- Tickets
| Position | Novice | Standard | Expert | Master |
|---|---|---|---|---|
| 1st | 17 | 24 | 35 | 46 |
| 2nd | 12 | 17 | 26 | 36 |
| 3rd | 10 | 15 | 24 | 33 |
| 4th-10th | 8 | 10 | 18 | 25 |
| 11th-20th | 7 | 8 | 15 | 22 |
| 21st-30th | 6 | 6 | 7 | 7 |
- Custom Parts
- Win Diamond Cup on Expert class: Body - Brave Eagle, Cockpit - Wonder Worm, and Booster - Euros DI
- Tracks
- Win the Ruby, Sapphire, Emerald, and Diamond Cups on Master class: Aeropolis: Screw Drive, Outer Space: Meteor Stream, Port Town: Cylinder Wave, Lightning: Thunder Road, Green Plant: Spiral
AX Cup
This section is a stub.
You can help the F-Zero Wiki by expanding it.
- Tickets
| Position | Novice | Standard | Expert | Master |
|---|---|---|---|---|
| 1st | 20 | 30 | 42 | 55 |
| 2nd | ||||
| 3rd | ||||
| 4th-10th | ||||
| 11th-20th | ||||
| 21st-30th |
- Tracks
- Win the AX Cup: Mute City: Sonic Oval
- Other
- Win all cups on Master class: "Sounds of MUTE CITY" and "Sounds of BIG BLUE"
F-Zero: GP Legend


In F-Zero: GP Legend, the player has access to the Novice, Standard, and Expert classes from the start, and the races differ in the cups on Expert class with a harder variant. Afterward, the player can select either the Bronze, Silver, or Gold Cups to race in, with an unlockable Platinum Cup that can be unlocked by clearing the other cups on Novice and Standard difficulty.
The player starts with four lives, except for on Expert Platinum, where the player has no spare machines. The cups consist of five tracks with five laps each, except for the Platinum Cup, which consists of eight tracks from the first F-Zero game. The final track in the Gold Cups are randomized between two tracks.
Upon completing one Grand Prix of any class and cup, the Training and Zero Test modes are unlocked.


Points
At the end of a race, the racers are awarded points based on their position. The racer in 2nd place for points will be considered the player's rival. If there is a tie at the conclusion of the Grand Prix, the pilot that placed 1st place the most will be declared 1st. If there is still a dispute at this point, whoever had the highest point total after the second to last race is rewarded 1st.
| Rank | 1 | 2 | 3 | 4 | 5 | 6 | 7 | 8 | 9 | 10 | 11 | 12 | 13 | 14 | 15 | 16 | 17 | 18 | 19 | 20 | 21 | 22 | 23 | 24 | 25 | 26 | 27 | 28 | 29 | 30 |
|---|---|---|---|---|---|---|---|---|---|---|---|---|---|---|---|---|---|---|---|---|---|---|---|---|---|---|---|---|---|---|
| Points | 100 | 93 | 87 | 81 | 76 | 71 | 66 | 62 | 58 | 54 | 50 | 47 | 44 | 41 | 38 | 35 | 33 | 31 | 29 | 27 | 25 | 23 | 22 | 21 | 20 | 19 | 18 | 17 | 16 | 15 |
F-Zero Climax

In F-Zero Climax, the player has access to the Novice, Standard, and Expert classes from the start. The Master class is unlocked by finishing first in one cup on Expert class. Afterward, the player can choose between the Bronze, Silver, or Gold cups. The Platinum cup is unlocked by finishing the other cups in first on both Novice and Standard classes. The races in Expert and Master classes are different, being changed versions of previous tracks or different tracks entirely.
Starting with the second lap, the player gains access to one Boost Fire per lap, similar to F-Zero and F-Zero: Maximum Velocity. In each cup, the player has to race on five tracks with three laps each. The Platinum cup, however, has eight tracks, with the last four being from the first F-Zero game.


Points
Unlike the previous two Game Boy Advance titles, F-Zero Climax has 24 racers rather than 30. The point distribution is as follows.
| Rank | 1 | 2 | 3 | 4 | 5 | 6 | 7 | 8 | 9 | 10 | 11 | 12 | 13 | 14 | 15 | 16 | 17 | 18 | 19 | 20 | 21 | 22 | 23 | 24 |
|---|---|---|---|---|---|---|---|---|---|---|---|---|---|---|---|---|---|---|---|---|---|---|---|---|
| Points | 100 | 93 | 87 | 81 | 76 | 71 | 66 | 62 | 58 | 54 | 50 | 47 | 44 | 41 | 38 | 35 | 33 | 31 | 29 | 27 | 25 | 23 | 21 | 20 |
F-Zero 99
In F-Zero 99, the Grand Prix is a limited time event consisting of five tracks from a cup that occurs every two hours on weekdays and every half hour on the weekend. When it becomes available, it will temporarily replace the Special Event menu option for 10 minutes. In order to participate, players need to spend 3 tickets which they can earn 1 for every 500 points gained through normal gameplay and once a day for logging into the game. When a Grand Prix becomes available, the main menu music becomes more vibrant and the player lobby will display falling confetti. The tracks will also receive a minor graphical change displaying the league's emblem on the road throughout parts of the track.
Like in a Mini Prix, players are required to meet the minimum safe rank in order to move onto the next leg of the race. While the first four legs start off in a wide, closed off area of the track before sending players through a one-way jump onto the main track like normal, the final leg starts off on the main track more akin to a typical F-Zero game. If a player KOs another machine during the Grand or Mini Prix, the extended power bar will carry over onto the next leg of the race which incentivizes players to obtain as many KOs as possible to gain an advantage.
Points
At the end of each race, players are awarded points based on their position. Between races, the player will see a leaderboard of all players in the Prix based on their points. The final leaderboard will show the standing based on those who finished the fifth race, though players who were disqualified for any reason will still receive the points that they earned based on their finishes.
| Rank | 1 | 2 | 3 | 4 | 5 | 6 | 7 | 8 | 9 | 10 | 11 | 12 | 13 | 14 | 15 | 16 | 17 | 18 | 19 | 20 | 21 | 22 | 23 | 24 | 25 | 26 | 27 | 28 | 29 | 30 | 31 | 32 | 33 | 34 | 35 | 36 | 37 | 38 | 39 | 40 |
|---|---|---|---|---|---|---|---|---|---|---|---|---|---|---|---|---|---|---|---|---|---|---|---|---|---|---|---|---|---|---|---|---|---|---|---|---|---|---|---|---|
| Points | 200 | 196 | 194 | 192 | 190 | 188 | 186 | 184 | 182 | 180 | 178 | 176 | 174 | 172 | 170 | 168 | 166 | 164 | 162 | 160 | 158 | 156 | 154 | 152 | 150 | 148 | 146 | 144 | 142 | 140 | 138 | 136 | 134 | 132 | 130 | 128 | 126 | 124 | 122 | 120 |
| Rank | 41 | 42 | 43 | 44 | 45 | 46 | 47 | 48 | 49 | 50 | 51 | 52 | 53 | 54 | 55 | 56 | 57 | 58 | 59 | 60 | 61 | 62 | 63 | 64 | 65 | 66 | 67 | 68 | 69 | 70 | 71 | 72 | 73 | 74 | 75 | 76 | 77 | 78 | 79 | 80 |
| Points | 118 | 116 | 114 | 112 | 110 | 108 | 106 | 104 | 102 | 100 | 98 | 96 | 94 | 92 | 90 | 88 | 86 | 84 | 82 | 80 | 78 | 76 | 74 | 72 | 70 | 68 | 66 | 64 | 62 | 60 | 58 | 56 | 54 | 52 | 50 | 48 | 46 | 44 | 42 | 40 |
Starting with the second race, the players' four rivals for the next race will be those between two positions above them and two positions below them on the leaderboard. If the player is at the top or bottom of the leaderboard, then the game will continue past the second position in either direction to ensure that the player has four rivals for the next race.
| Rank on leaderboard | 1st | 2nd | 3rd | ... | 78th | 79th | 80th |
|---|---|---|---|---|---|---|---|
| Rivals for next race | 2nd to 5th | 1st, 3rd to 5th | 1st, 2nd, 4th, 5th | ... | 76th, 77th, 79th, 80th | 76th to 78th, 80th | 76th to 79th |
Rewards
The following rewards are exclusive to participating in a Grand Prix.
Machines
| Achievement | Blue Falcon | Golden Fox | Wild Goose | Fire Stingray |
|---|---|---|---|---|
| Finish in 1st place in a Grand Prix |
Badges
| Badge | Achievement |
|---|---|
| Finish in 1st place in the Grand Prix - Knight League - | |
| Finish in 1st place in the Grand Prix - Queen League - | |
| Finish in 1st place in the Grand Prix - King League - |
References
- ↑ Nintendo Power volume 145 - Old Game Mags
- ↑ Ticket and machine part requirements are outlined in the Nintendo Power Player's Guide, aside from the AX Cup
| v F-Zero | |
|---|---|
| Pilots | Captain Falcon • Dr. Stewart • Pico • Samurai Goroh |
| Machines | Blue Falcon • Fire Stingray • Golden Fox • Wild Goose |
| Planets | Big Blue • Death Wind • Fire Field • Mute City • Port Town • Red Canyon • Sand Ocean • Silence • White Land |
| Tracks | Mute City I • Big Blue • Sand Ocean • Death Wind I • Silence |
| Mute City II • Port Town I • Red Canyon I • White Land I • White Land II | |
| Mute City III • Death Wind II • Port Town II • Red Canyon II • Fire Field | |
| Track Features | Anti-Gravity Guide Beam • Dash Zone • Jump Plate • Magnetic Field Block Coat • Mine • Pull Magnet • Pit • Rough |
| Mechanics | Boost • Drift • Energy • Rocket Start • Short Cut Foul |
| Modes | Grand Prix • Practice • Records |
| Other | Album • F-Zero: The Story of Captain Falcon • Mr. Zero • Official Recorder |
| v BS F-Zero Grand Prix / BS F-Zero Grand Prix 2 | |
|---|---|
| Machines | Blue Thunder • Fire Scorpion • Green Amazone • Luna Bomber |
| Venues | Big Blue • Death Wind • Fire Field • Forest • Metal Fort • Mute City • Port Town • Red Canyon • Sand Ocean • Sand Storm • Silence • White Land |
| Track Features | Anti-Gravity Guide Beam • Dash Zone • Jump Plate • Magnetic Field Block Coat • Mine • Pit • Pull Magnet • Rough |
| Mechanics | Boost • Drift • Energy • Rocket Start • Short Cut Foul |
| Modes | Free Practice • Grand Prix • Records |
| Others | Official Recorder |
| v F-Zero: Maximum Velocity | |
|---|---|
| Pilots | Alexander O'Neill • Blitz Wagner • Jane B. Christie • Kent Akechi • Kumiko • Lord Cyber • Megan • Mickey Marcus • Nichi • Professor Yazoo Jr. |
| Machines | Falcon MK-2 • Fighting Comet • Fire Ball • Hot Violet • J. B. Crystal • Jet Vermilion • Silver Thunder • Sly Joker • The Stingray • Wind Walker |
| Venues | Ancient Mesa • Beacon Port • Bianca City • Cloud Carpet • Crater Land • Empyrean Colony • Fire Field • Stark Farm • Silence • Synobazz • Tenth Zone East |
| Track Features | Anti-Gravity Guide Beam • Crater • Dash Zone • Jump Plate • Magnetic Field Block Coat • Mine • Motion Strip • Pull Magnet • Pit • Rough • Twist Plate |
| Mechanics | Boost • Blast Turn • Drift • Drift Turn • Energy |
| Modes | Championship • Demonstration • Grand Prix • Password • Records • Replay • Training |
| v Game modes | |
|---|---|
| Championship • Course Edit • Death Race • Demonstration • Emblem Editor • F-Zero Shop • F-Zero TV • Garage/Create Machine • Grand Prix • Password • Pilot Profiles • Practice • Replay • F-Zero GX Story • F-Zero: GP Legend Story • Survival • Time Attack • Zero Test | |